Home / Hobby horsing / How to make a hobby horse
Hobby horsing · DIY
A free pattern, a materials list and step-by-step instructions. A weekend and a grown-up with a sewing machine are enough, and a sock horse for a toddler takes about an hour.
| Time | 4–8 hours for a hobby horse, about an hour for a sock horse |
|---|---|
| Difficulty | medium: straight seams by machine or by hand |
| Head size | about 41 × 55 cm (16 × 22 in) from the pattern |
| Age | kids from 10–12 can sew with an adult |
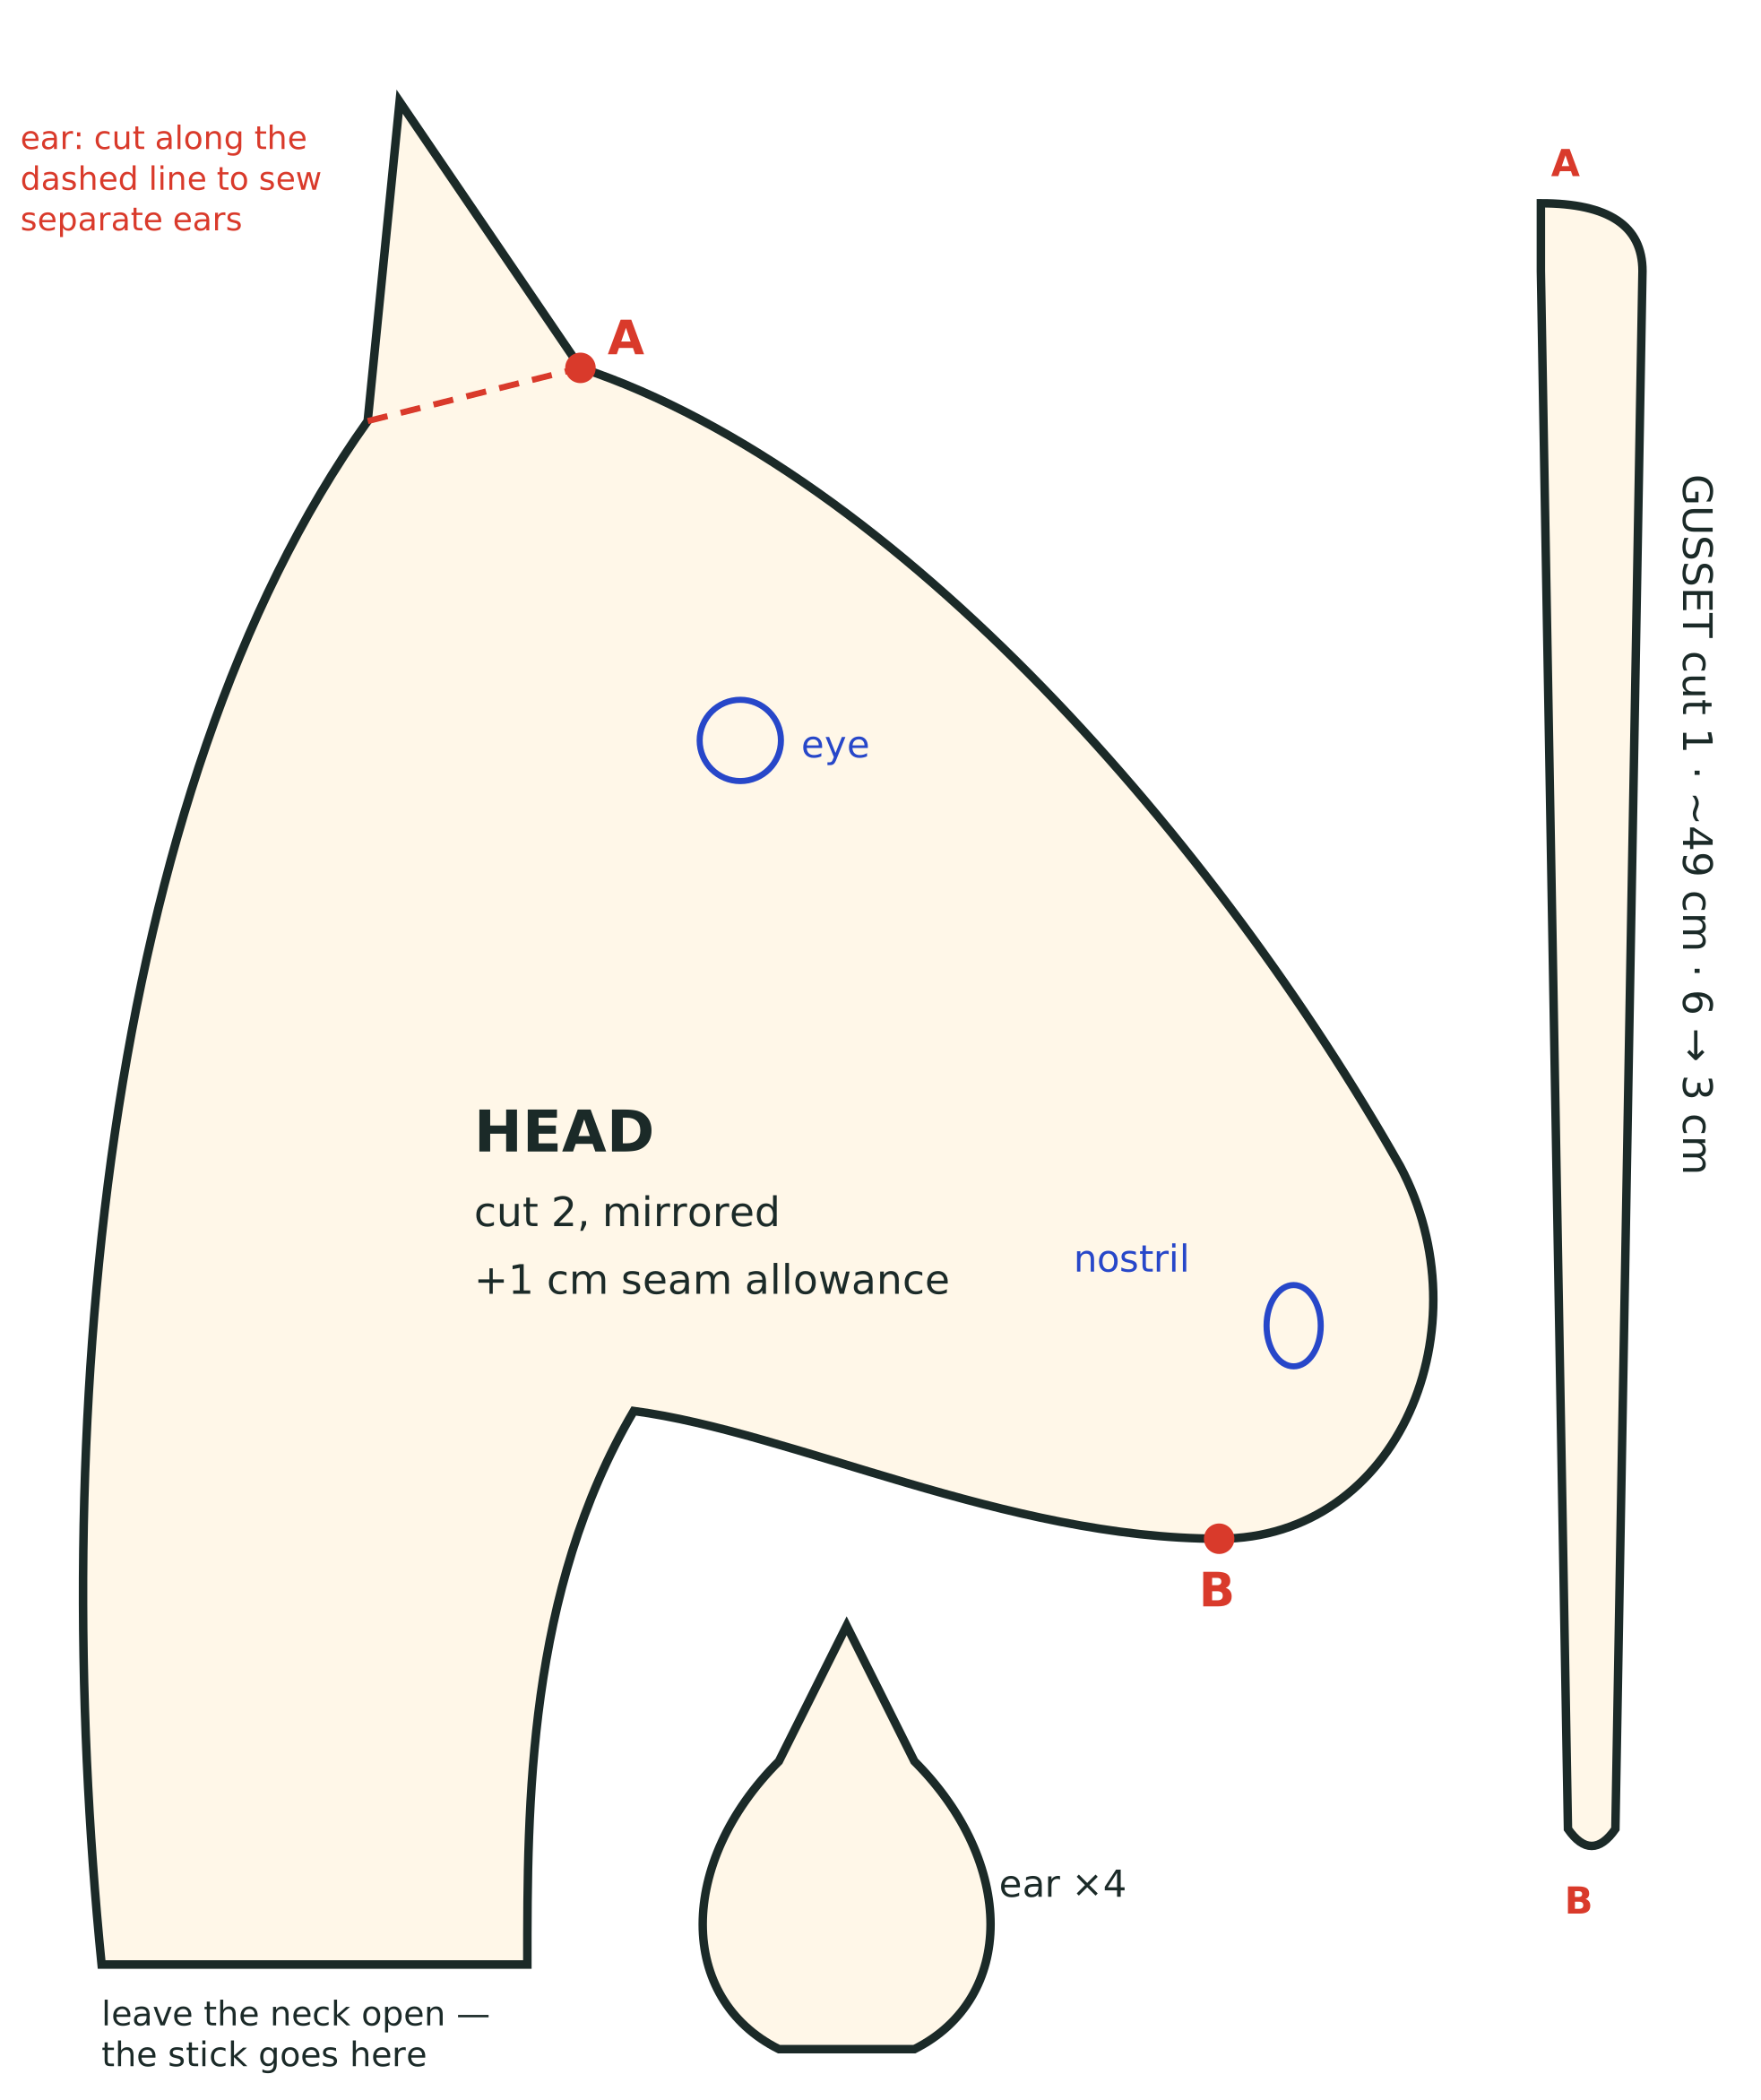
One square is 5 × 5 cm (about 2 in). Copy the pieces onto cardboard square by square, or download the life-size pattern (SVG, 52 × 62 cm). A print shop can print it, or use poster mode to print it over several sheets. Seam allowance (1 cm) is not included.
Copy the head, gusset and ear onto cardboard and cut out the templates. Mark points A and B, the eye and the nostril on the head.
Fold the fabric right sides together with the pile running down towards the neck. Trace the head and cut both halves at once with 1 cm seam allowance. Cut the gusset as a single piece.
For separate ears, place two pieces right sides together, stitch around the edge and turn them out. A lighter fabric inside looks nice. Fold the base of each ear in half so it stands up.
Pin the gusset to one head half from point A on the forehead to point B under the muzzle and stitch. Then attach the other half the same way. The gusset gives the head volume; without it the face looks flat.
Sew the halves together along the neck and poll, with the ears in the seam on top of the head. Leave the bottom of the neck open. Clip the seam allowance on curves so the seam lies flat.
Turn the head right side out. Stuff in small pieces, starting with the muzzle: it should be firm and hold its shape. Stuff the neck more softly, since the stick goes there.
Wrap the top of the stick in stuffing and tape so it cannot poke through. Push it about two thirds of the way into the head and add stuffing around it. Gather the fabric at the bottom of the neck around the stick and pull a cable tie tight, then cover it with tape or glue.
Cut yarn into 15–25 cm strands and sew them in bunches along the seam from the ears down the neck. A strip of faux fur or fleece fringe is quicker.
Make the eyes and nostrils from felt or embroider them. Buttons and plastic eyes are not safe for little kids: they can come off.
Use webbing to make a browband, a noseband and cheek pieces, joined with rings. The reins are a strip of webbing about 1 m long sewn to the rings. Put a cap on the end of the stick.
Bay: brown plush with a black mane. Palomino: golden plush with a white mane. Pinto: white fabric with sewn-on patches. You will find a tip for every color on our pages about horse coat colors.
Fleece or plush, fibrefill, a wooden stick 80–100 cm long, yarn for the mane and felt for the eyes. The bridle is made from webbing or ribbon.
A first hobby horse usually takes 4–8 hours, so plan a weekend. A sock horse takes about an hour.
Yes. Sew by hand with a small backstitch, two rows deep, so the seam holds the stuffing and survives jumping.
Usually 80–100 cm (32–40 in) and 2–2.5 cm thick. Shorter for little kids, longer for teens. Try it before fixing the head.
Stuff the neck firmly around the stick and pull a cable tie tight at the bottom. You can also glue the fabric to the stick and wrap it with tape.
The pattern on this page is free: copy it using 5 × 5 cm squares or download the life-size SVG.